Appearance
data を定義し、商品をレンダリングする
本章の概要とゴール
本章では、作成したアプリケーションに JavaScript、HTML、CSS を追加して商品を表示するページを作っていきます。 本章を実践すると、1 つの商品を表示するページが作成でき、Vue.js ではどのようにページがレンダリングされるのかが理解できます。
VS Code の起動
まず、VS Code で先ほど作成したプロジェクトを開きましょう。プロジェクトの開き方は 2 通りありますので、使いやすい方で起動して下さい。
コマンドから起動する方法
カレントディレクトリ(プロジェクトのディレクトリ、今回の例では vue3-lab)で以下のコマンドを実行します
bash
code .GUI で起動する方法
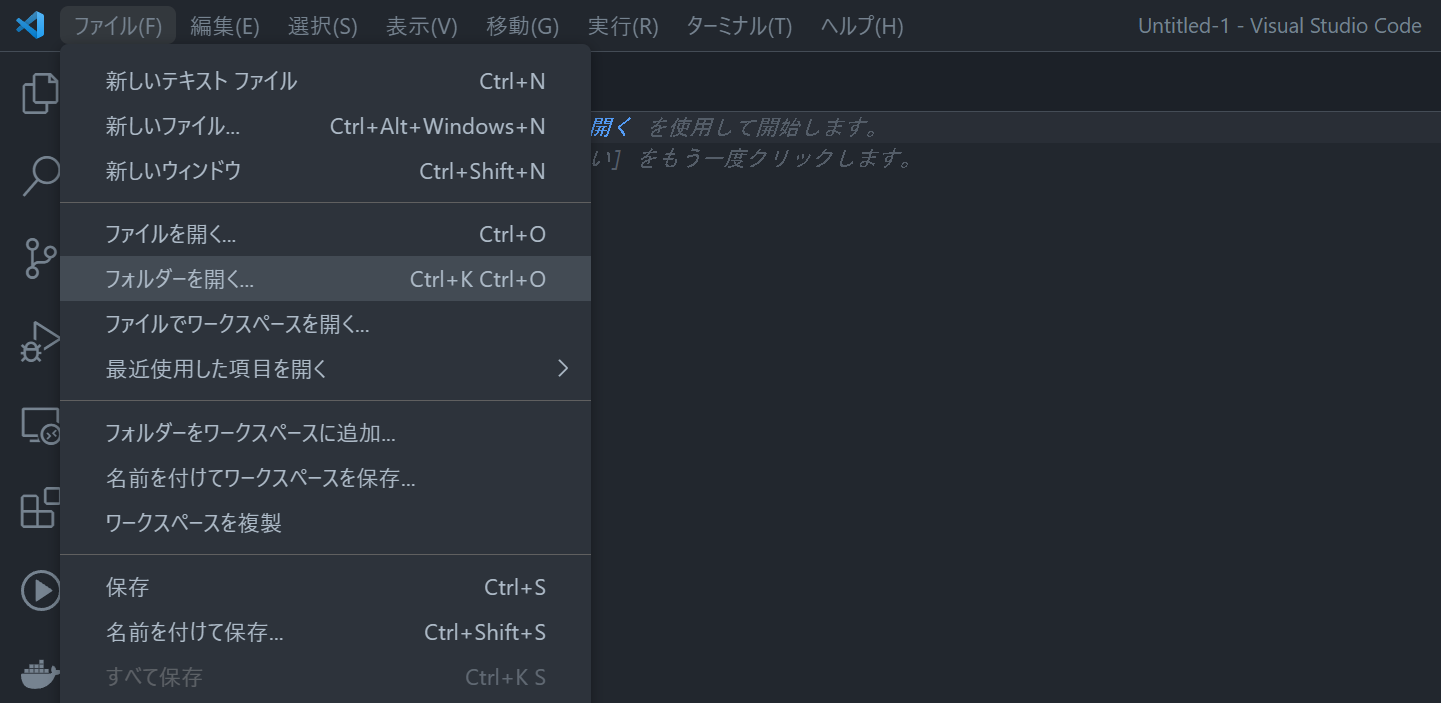
アプリケーションのメニューで Visual Studio Code を起動し、「ファイル」-「フォルダーを開く」で自分の環境のプロジェクトディレクトリを選択します。
画像ファイルの配置
次に、ハンズオンで使う商品の画像を用意しましょう。ハンズオン用の画像ファイル(vue3-lab-handson-images.zip)をダウンロードおよび解凍します。
あらかじめ作成しておいた Vue.js プロジェクトを開き、 public ディレクトリの下に images ディレクトリを新しく作成します。作成した images ディレクトリの中に、先ほど解凍した画像ファイルをすべてコピーします。
コード変更の準備
ここからは、デフォルトで生成された Vue のプロジェクトを独自のコードに置き換えていきます。まず、今後のステップで利用しない不要なコードやファイルを削除していきましょう。
まず、src/main.js から今回は利用しない不要な css ファイルの import 削除します。
変更前(src/main.js)
js
import { createApp } from 'vue'
import App from './App.vue'

import './assets/main.css'

createApp(App).mount('#app')変更後(src/main.js)
js
import { createApp } from 'vue'
import App from './App.vue'

createApp(App).mount('#app')
次に、今後のステップで利用しないファイルをディレクトリごと削除します。削除する対象は以下のディレクトリです。
src/assets/以下すべてsrc/components/以下すべて
Mustache 構文
Vue.js では、{{ }} のような Mustache 構文を使ってテキストをレンダリングできます。以下の例では script 部分の message を表示しています。message の内容が変更されると、それに応じて表示も更新されます。
vue
<script setup>
import { ref } from 'vue'
const message = ref('Welcome to Vue Handson!')
</script>

<template>
  <div>{{ message }}</div>
</template>
js
import { createApp } from 'vue'
import App from './App.vue'

createApp(App).mount('#app')
出力例
Welcome to Vue Handson!ヒント
mustache とは口髭を指す英語で、二重中括弧 {{ }} が口髭のように見えることから命名されました。
商品をレンダリング
プロジェクトのファイルを書き換えて、商品をレンダリングしていきましょう。まず、src/App.vue ファイルの template を次のように変更します。
変更前(template)
vue
<template>
  <header>
    <img alt="Vue logo" class="logo" src="./assets/logo.svg" width="125" height="125" />

    <div class="wrapper">
      <HelloWorld msg="You did it!" />
    </div>
  </header>

  <main>
    <TheWelcome />
  </main>
</template>
変更後(template)
vue
<template>
  <header class="header">
    <img
      src="/images/logo.svg"
      alt="">
    <h1>Vue.js ハンズオン</h1>
  </header>
  <main class="main">
    <div class="item">
      <div class="thumbnail">
        <img
          :src="item.image"
          alt="">
      </div>
      <div class="description">
        <h2>{{ item.name }}</h2>
        <p>{{ item.description }}</p>
        <span>¥<span class="price">{{ item.price }}</span></span>
      </div>
    </div>
  </main>
</template>次に、src/App.vue ファイルの script を次のように変更します。
変更前(script)
vue
<script setup>
import HelloWorld from './components/HelloWorld.vue'
import TheWelcome from './components/TheWelcome.vue'
</script>
変更後(script)
vue
<script setup>
import { ref } from 'vue'
const item = ref({
    id: 1,
    name: 'アボカドディップバケット',
    description:
      '刻んだ野菜をアボカドと混ぜてディップに。こんがり焼いたバゲットとお召し上がりください。',
    price: 480,
    image: '/images/item1.jpg'
})
</script>
見た目を設定するために style タグの中身を以下のように置き換えます。
vue
<style>
body {
  font-family: sans-serif;
  margin: 0;
  -webkit-font-smoothing: antialiased;
  -moz-osx-font-smoothing: grayscale;
}

#app {
  width: 90%;
  margin: 0 5%;
  color: #242424;
}

.header {
  display: flex;
  align-content: center;
  align-items: center;
  margin-top: 40px;
  margin-bottom: 40px;
}

.header > img {
  width: 100px;
  height: 100px;
  margin-right: 20px;
}

.header > h1 {
  font-size: 80px;
  font-weight: bold;
  line-height: 80px;
  margin-top: 0;
  margin-bottom: 0;
}

.main {
  display: grid;
  grid-template-columns: 3fr 3fr 3fr 3fr;
  column-gap: 24px;
  row-gap: 24px;
}

.item {
  padding: 10px;
  cursor: pointer;
}

.item:hover {
  transition: 0.2s transform ease-out;
  transform: scale(1.05);
}

.item > div.thumbnail > img {
  width: 100%;
  height: calc(100%);
  object-fit: cover;
}

.item > div.description {
  text-align: left;
  margin-top: 20px;
}

.item > div.description > p {
  margin-top: 0px;
  margin-bottom: 0px;
  font-size: 18px;
  line-height: 25px;
}

.item > div.description > span {
  display: block;
  margin-top: 10px;
  font-size: 20px;
}

.item > div.description > span > .price {
  font-size: 28px;
  font-weight: bold;
}
</style>
これで、商品を 1 つレンダリングできました。
+1 チャレンジ
ここまでの学習が完了した人は、以下の内容にも挑戦してみましょう。
商品の内容を変更
商品の内容を変更し、表示に反映されることを確認してみましょう。商品名 name、概要文 description、価格 price をそれぞれ適当に変更します。
変更前(script)
vue
<script setup>
import { ref } from 'vue'
const item = ref({
    id: 1,
    name: 'アボカドディップバケット',
    description:
      '刻んだ野菜をアボカドと混ぜてディップに。こんがり焼いたバゲットとお召し上がりください。',
    price: 480,
    image: '/images/item1.jpg'
})
</script>
変更後(script)
vue
<script setup>
import { ref } from 'vue'
const item = ref({
    id: 1,
    name: 'アボカドソースバケット',
    description:
      '刻んだ野菜をアボカドと混ぜ、優しい味のソースに。こんがり焼いたバゲットとお召し上がりください。',
    price: 320,
    image: '/images/item1.jpg'
})
</script>
このようにデータを更新したとき、自動的に表示が更新される状態のことを、「リアクティブ」と言います。